


Reference
Frequently asked questions.
- How to import data into Form Bio?
- From personal machine
- From external source
- How to copy data from Form Bio to Google Cloud Storage?
- How to add Users to a Project?
- How to use the Spreadsheet Input?
- How can I visualize data?
- How to create index files for opening files in IGV?
- Create Index file for *.vcf.gz
- Create Index file for *.fasta
How to import data into Form Bio?
From personal machine
Importing data to the Form Bio platform from your personal machine is quick and easy.
First, navigate to the Files tab on the left-hand side of the screen

Once in the file explorer, locate the Add Files button in the top-right corner.

Follow the prompts to upload either a file or a folder to the Form Bio platform. Uploaded files and folders will appear on the launcher.


When you have selected all desired files, click the Start Uploading button. Your files will be uploaded (this could take a few minutes) and you can view them by click the Go to Folder button in the pop-up window.

From external source
Form Bio offers a number of workflows for retrieving data from external databases.
How to copy data from Form Bio to Google Cloud Storage?
Install the
Then on a local machine or a VM on GCP you can download files from Form Bio then upload to GCS using your user’s credentials e.g.
# Copy Colossal form bio data locally (or on a VM)
$ formbio storage cp formbio://organization/project/folder_to_copy .

$ gsutil cp -r . gs://gcs-bucket-customer-owns
How to add Users to a Project?
See :
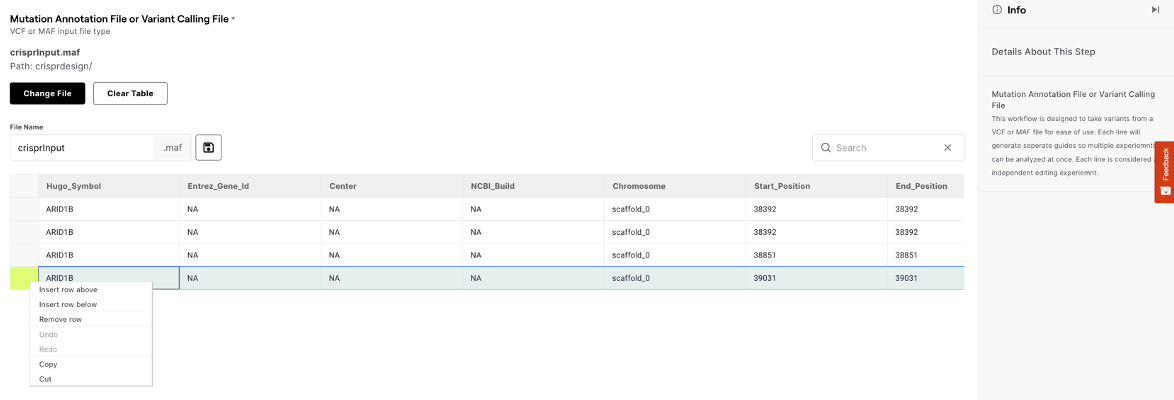
How to use the Spreadsheet Input?
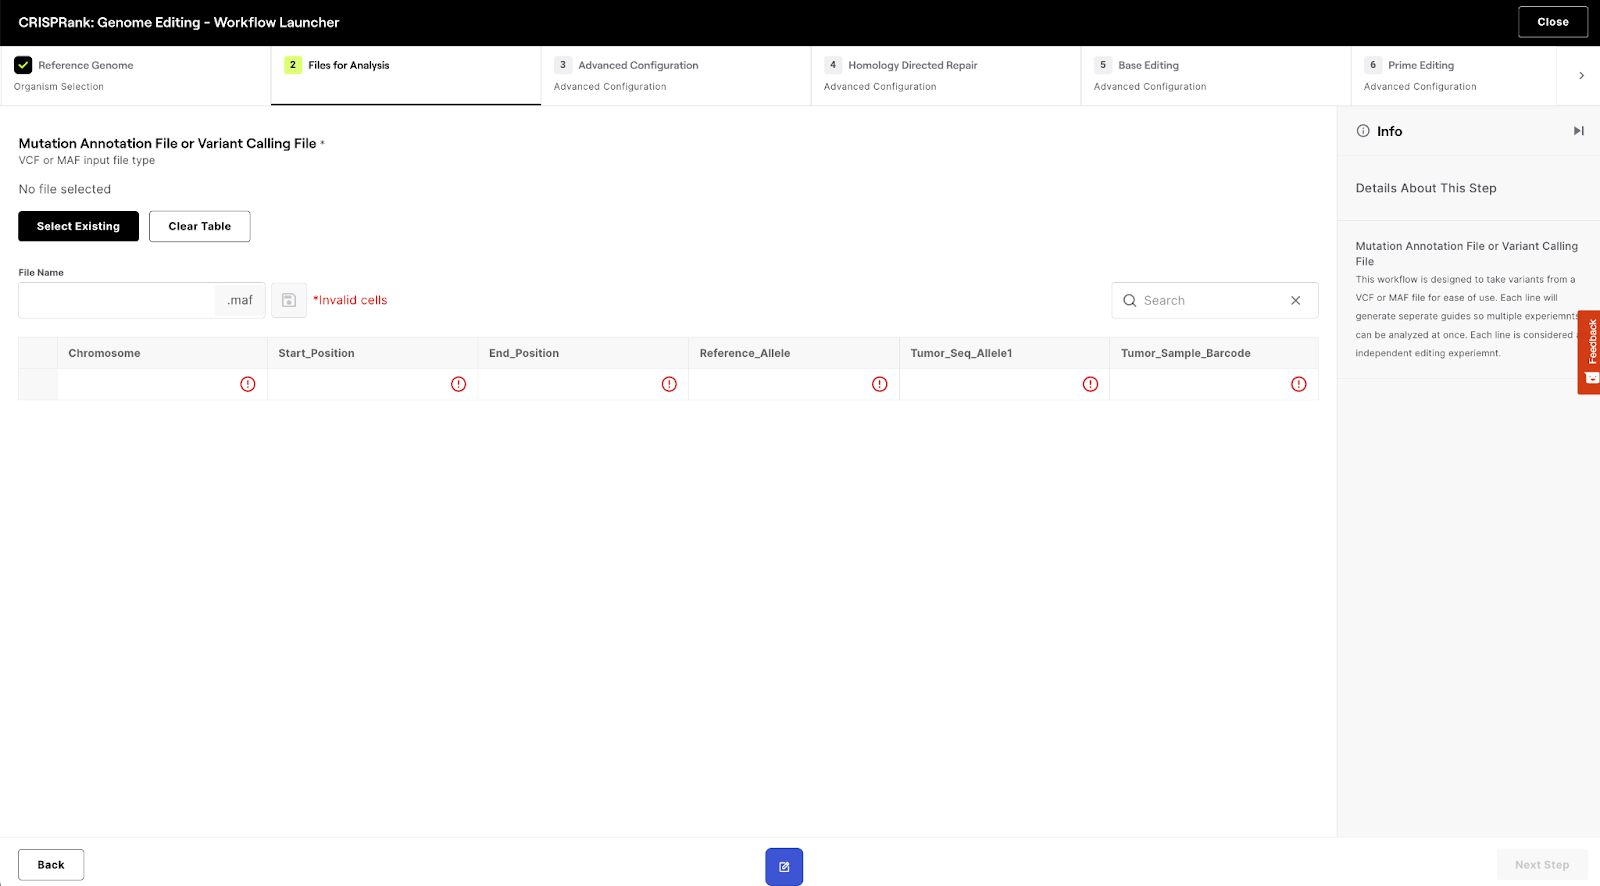
On workflows where a spreadsheet is available, you can:
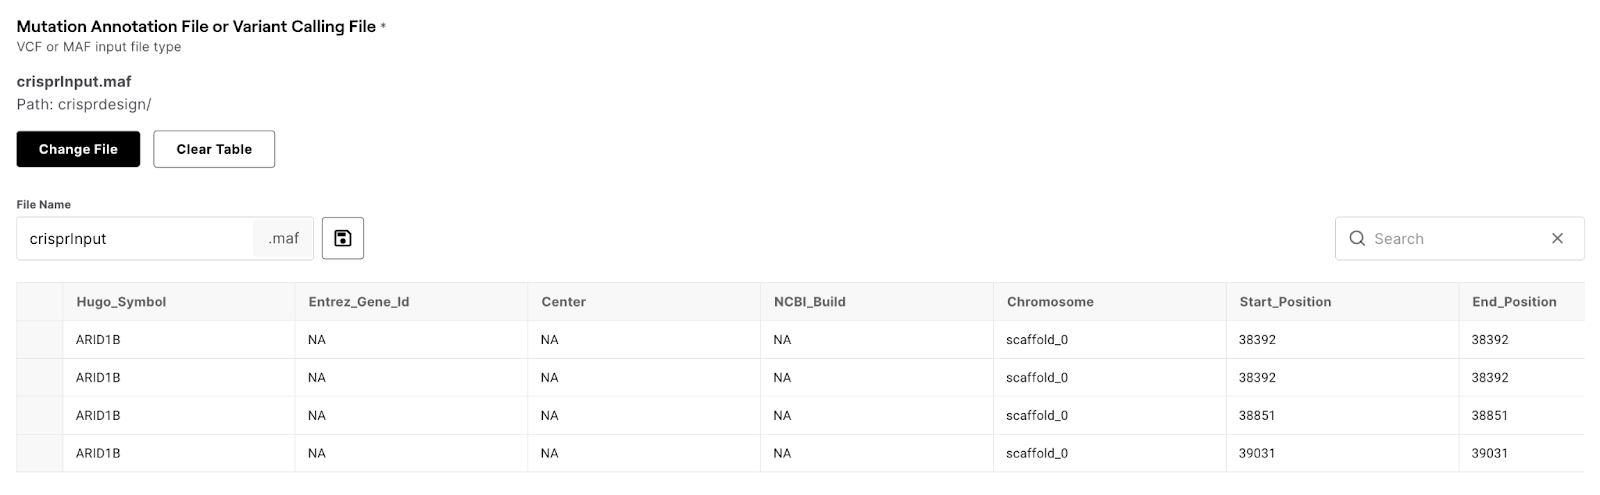
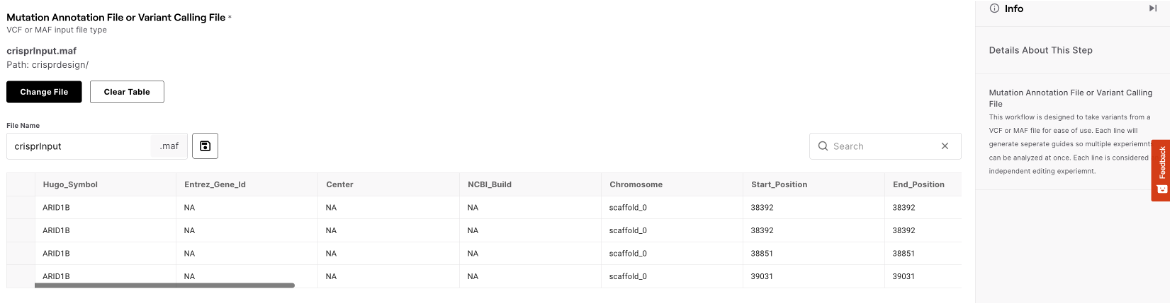
- Select a file, which will populate the sample sheet
- Create a file by typing in data
- Copy-paste data from excel, etc.
- Scroll to the right to show more columns
- Right click on a row to open menu of options
- Right click on a column to open menu of options
- Multiselect rows by dragging the bottom right corner of a cell
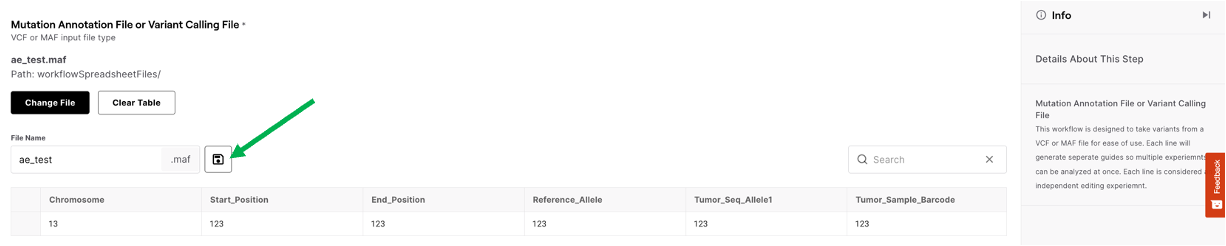
- Save a file after creating or editing one
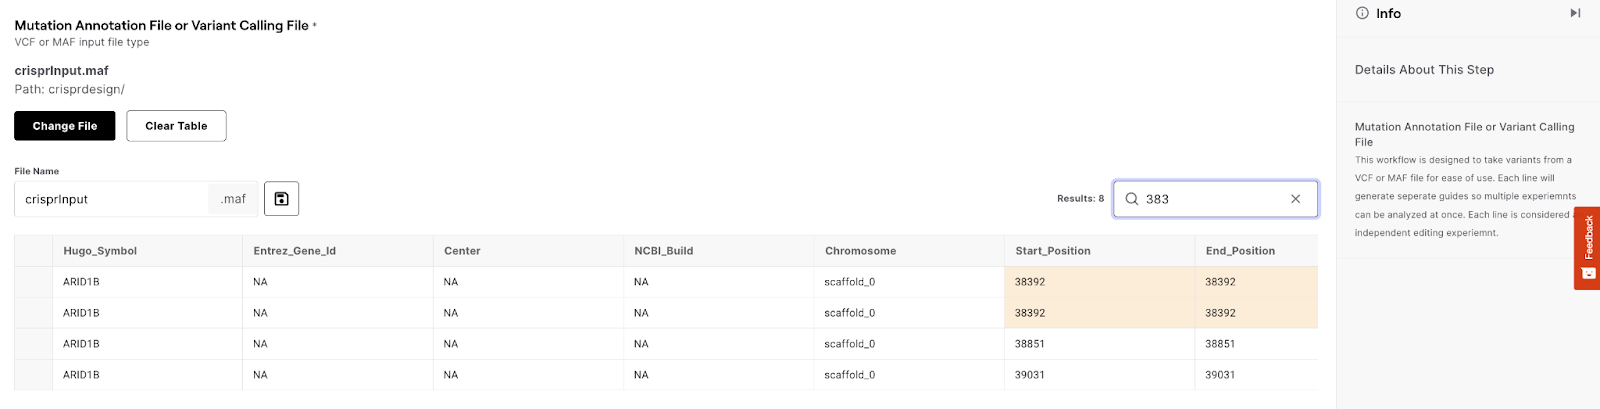
- Search to find cells with matching input
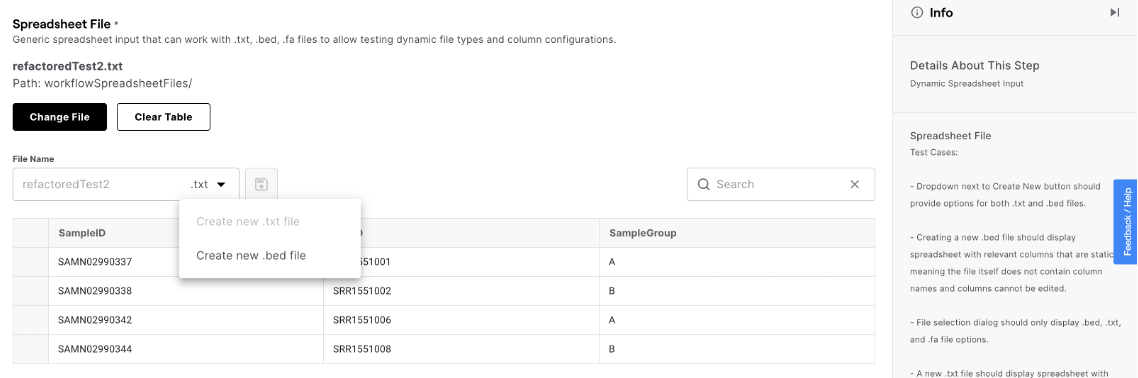
- If a spreadsheet can support multiple file types, then you can choose what to save the file as by clicking on the file extension dropdown


Notes
- Columns currently cannot be added or removed. They will either be populated by an existing file, if selected, or the table will only show predefined columns.
- After editing the spreadsheet, it must be saved to be selected as the input. Save will be disabled until all cells are valid.
- If used as a sample sheet that depends on a previously selected input directory, RunID values will be automatically populated based on the files within the selected directory.
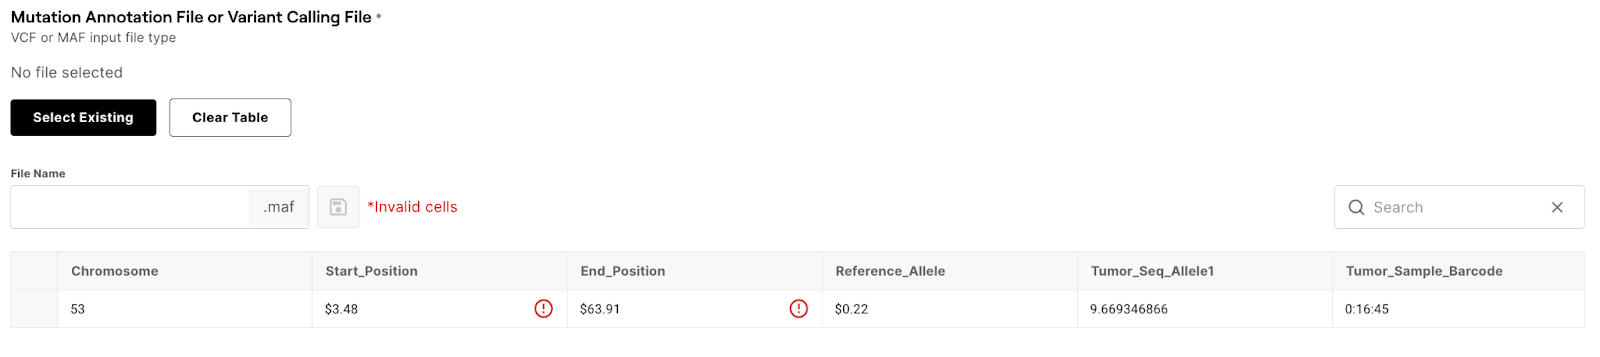
Errors
You will receive errors as noted by a red exclamation point when:
- The type of data does not match the expected data (e.g./if the column asks for a number and you paste in text)
- A required cell is blank
How can I visualize data?
Most types of data can be visualized using the Integrative Genome Viewer (IGV) application directly from the Form Bio platform. Additional information about IGV may be found at https://igv.org/
- To visualize a file with IGV, first locate the file explorer on the Form Bio platform
- Next, navigate to the file you wish to visualize and click the three dots near the right side
- Select “View/Open” from the dropdown menu
- Select a reference in the launcher that appears
- Visualize your file in the IGV application that will open in a new tab
- Specific chromosomes can be viewed in greater detail using the dropdown menu on the top left of the screen
- Zoom in or out on the tracks using the slider on the top right hand side. This can be helpful in seeing certain regions in greater detail


Most filetypes can be opened in IGV. PDB files, however, can be opened using Molstar. More information about Molstar can be found at https://molstar.org/.
- To visualize a file with Molstar, follow the same steps as above, navigating to your file in the explorer and clicking on the three dots on the righthand side of the file. Select “Open with Molstar Protein Visualization” from the dropdown menu
- Molstar will visualize your file in a separate tab


How to create index files for opening files in IGV?
NOTE: Ensure any track files > 2mb have a corresponding Index file so that IGV can incrementally stream data to a users web browser, or create the index file (e.g. using samtools or tabix) and ensure its in the same folder as the sequence file.
For example if you have a *.vcf.gz you can download it and generate an index track file *.vcf.gz.tbi and upload that to the same folder as the track. Using the formbio CLI tool.
Create Index file for *.vcf.gz
# Download *.vcf.gz
$ formbio storage cp formbio://customer-org/customer-project/Experiment/VariantCalling/variant_calls/sample_vars.snpEff.sift.final_annot.vcf.gz .
# Create index file *.vcf.gz.tbi
$ tabix -f -p vcf sample_vars.snpEff.sift.final_annot.vcf.gz
# Upload index file to the same folder as the track
$ formbio storage cp sample_vars.snpEff.sift.final_annot.vcf.gz.tbi formbio://customer-org/customer-project/Experiment/VariantCalling/variant_calls/sample_vars.snpEff.sift.final_annot.vcf.gz.tbi
Create Index file for *.fasta
Following the instructions above for downloading and uploading index files to your Form Bio project.
$ samtools faidx genome.faSee file formats and index formats supported by IGV Web here:
← Previous
Add link here
Next →
Add link here
On this page
- How to import data into Form Bio?
- From personal machine
- From external source
- How to copy data from Form Bio to Google Cloud Storage?
- How to add Users to a Project?
- How to use the Spreadsheet Input?
- How can I visualize data?
- How to create index files for opening files in IGV?
- Create Index file for *.vcf.gz
- Create Index file for *.fasta